A Guide to Herb Garden Essentials: Cultivating Flavor and Aroma
Introduction
Welcome to the wonderful world of herb gardening! Growing your own herbs has been such a rewarding endeavor for me, allowing me to enjoy fresh, flavorful herbs for culinary uses, natural remedies, beauty products, and more.
From my experience, herbs have an alluring scent and taste that simply can’t be replicated by dried herbs from the store. Plus, growing my own herbs gives me full control over the quality and freshness of the plants. Whether you’re a beginner herb gardener or a seasoned pro, I assure you that cultivating a thriving herb garden is easier than you think with the right guidance.
In this comprehensive guide that I’ve created, I will cover everything you need to know to successfully grow herbs at home, just like I have done. You’ll learn the herb gardening basics that have helped me be successful, tips for selecting herbs that grow well in your climate, recommendations for must-have herb varieties that I personally grow, and simple techniques for harvesting and preserving the bountiful herbs from your garden. Follow along to embrace the joys and rewards of herb gardening for yourself, just as I have!
Key Points:
- Growing herbs like parsley, cilantro, and dill allows you to add fresh flavor to dishes in your kitchen garden.
- An indoor herb garden is an easy way to have herbs within reach for cooking all year long.
- Essential culinary herbs include parsley, basil, oregano, and tarragon for their versatility.
- Annual and biennial herbs like dill, basil, and chervil must be replanted each year as they bolt and go to seed.
- Planting an herb garden near your kitchen or in containers makes it simple to harvest fresh herbs to flavor your meals.
One of the key benefits of growing your own herbs is being able to use fresh cut herbs straight from the garden. The flavor and aroma of just-snipped herbs is incredibly potent, especially when compared to dried herbs. Dried herbs tend to lose some of their essential oils and flavor notes during the drying process.
Most cooks would agree that nothing compares to using freshly minced basil straight from the plant for homemade pesto or garnishing a caprese salad with fragrant spears of homegrown basil. The scent of lemon verbena and rosemary evoke the essence of Mediterranean cuisine, while homegrown mint is a refreshing addition to summer beverages like mint juleps, mojitos, and mint tea.
When herbs are harvested and used right away, you get the full experience of their unique flavor, aroma, and culinary versatility. An herb garden ensures you always have a supply of the freshest herbs right at your fingertips.
Benefits of Herb Gardening
Beyond fresh flavor, growing herbs offers many other benefits:
- Convenience – Having an herb garden at home provides easy access to herbs whenever you need them for cooking. No more last-minute runs to the grocery store!
- Health benefits – Many culinary herbs also offer nutritional and potential therapeutic properties. For example, parsley is high in vitamin K while oregano contains antimicrobial compounds.
- Decorative appeal – Herb gardens lend beauty, fragrance, and texture to both indoor and outdoor spaces. The visually pleasing varieties and leaf shapes create interest.
- Pollinator support – Flowering herbs like lavender, oregano, thyme, and basil provide nectar for pollinators. An herb garden invites bees, butterflies, and hummingbirds.
- Cost savings – Growing your own herbs is much cheaper than buying packaged herbs from the grocery store, saving you money in the long run.
- Flavor control – With homegrown herbs, you can control the conditions and harvest time. You’ll become an expert on achieving each herb’s ideal flavor at the perfect time for harvesting.
- Fun and rewarding – Finally, herb gardening is a fun, engaging hobby for gardeners of all experience levels. The hands-on process of nurturing herbs from seeds or starts and finally using the mature plants is extremely rewarding.
A Rewarding Endeavor
As you can see, herb gardening has so many benefits beyond just having a supply of flavorful herbs for cooking. The process allows you to intimately understand how each type of herb grows, what conditions it thrives in, and the perfect time to harvest for peak flavor.
While it does take some time investment on the front end to plan and establish an herb garden, the long-term rewards are well worth it. Once your plants are happily established, you’ll have herbs growing abundantly with minimal effort aside from regular harvesting.
Follow along as we delve into the specifics of planning, growing, troubleshooting, and preserving your own herb garden at home. Let’s explore how you can craft a thriving, low-maintenance herb garden that will provide you with heaps of rewards for years to come!
Essential Supplies for Herb Gardening Success
While getting started with an herb garden does require some initial investment and preparation, you don’t need a lot of fancy tools or expensive equipment. Here are the basic supplies we recommend having on hand:
Herb Seeds or Seedlings
Of course, the plants themselves are essential! Most herb gardeners recommend starting with young starter plants or seedlings if possible, as germinating herbs from seed can be tricky with fussy temperature regulation. Check your local garden nursery for a wide selection of popular culinary herb starters such as:
- Basil
- Thyme
- Rosemary
- Oregano
- Sage
- Mint
- Chives
- Cilantro
- Parsley
- Dill
If you do opt to grow from seed, be sure to choose high-quality, non-GMO, organic herb seeds from a reputable source. You’ll likely have the best success starting seeds indoors or in a greenhouse with temperature control.
Containers or Raised Beds
You have flexibility when it comes to choosing containers or garden beds for planting your herbs.
-
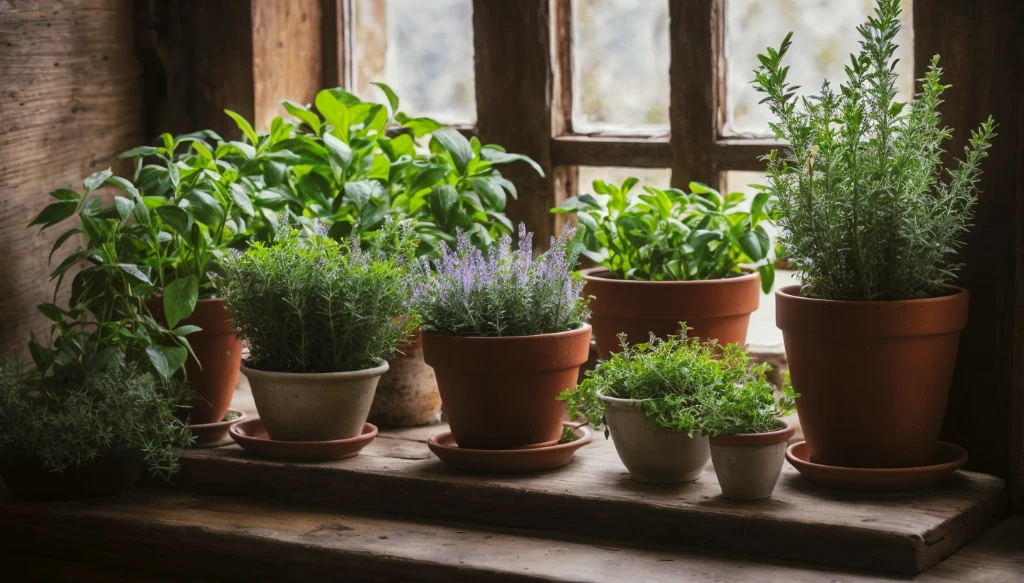
- For small patio or indoor herb gardens, you may opt for traditional terracotta pots or pretty patterned pots. Match the container size to the expected mature size of the herb variety.
- For larger scale in-ground herb gardens, building a dedicated raised bed with higher walls allows you to fill it with quality soil suited to herbs.
- You can also plant herbs among ornamentals or edibles in existing garden beds. Just be mindful of sun exposure and any companion planting recommendations.

Herb Pots and Containers
Herbs planted in containers need a pot with drainage holes at the bottom and a saucer to catch water. Self-watering pots are also convenient for maintaining moisture. Choose pot sizes around 12 inches wide and 10 inches deep for full-sized herbs. Dwarf and miniature varieties can thrive in shallower pots or window boxes. For indoor growing, look for decorative cachepots to place over the drainage pots.
Herb Soil and Potting Mix
Most herbs thrive in a well-draining soil or potting mix amended with organic matter like compost. Pre-mixed potting soil designed for herbs, vegetables, or container plants is a convenient option. You can also make your own mix by combining peat moss or coconut coir, perlite or vermiculite, and compost.
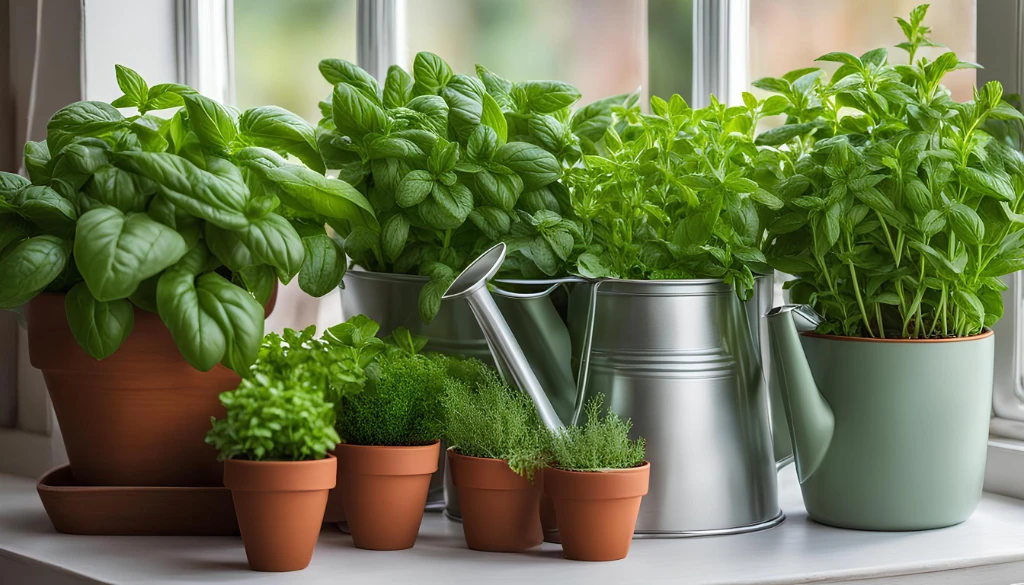
Watering Can or Watering System
Frequent watering is crucial for container grown herbs and during an herb garden’s establishment. Invest in a watering can with a long spout for easy, gentle watering. For large gardens, a hose sprayer with varied settings allows more precision. You can also install a drip irrigation system or soaker hoses to automate watering.
Herb Watering Cans and Sprayers
Look for watering cans and hoses with adjustable heads for gentle watering. Long spouts and rose attachments prevent soil erosion. Small 2-4 quart capacity cans are great for herbs in pots, while 1-2 gallon capacity cans work for garden beds. Hose attachments with varied spray patterns are perfect for convenient garden watering.
Trowel or Spade
A hand trowel helps dig holes for transplanting seedlings or aerating soil. Sturdy spades efficiently break up soil and blend in amendments. Look for ergonomic handles and blades made from strong forged steel.
Herb Gardening Tools
Essential herb gardening hand tools include:
- Trowels for transplanting and digging
- Spades for turning soil
- Pruning shears for harvesting
- Gardening gloves for protecting hands
- Weed pullers for removing unwanted plants
Look for tools with ergonomic grip handles and heads made from durable materials like stainless steel.
Gardening Gloves
Protect your hands from blisters, scrapes, and dirt with a pair of comfortable gardening gloves. Options range from lightweight cotton gloves to heavy-duty leather work gloves.
Pruning Shears
Dedicated herb snips or gardening pruners allow you to neatly harvest herbs at their peak. Look for small, lightweight shears that feel comfortable in your hand.
Garden Ties or Stakes (for larger plants)
Securing taller, leggy herbs like mint or thyme prevents them from flopping over (known as “lodging”). Use soft plant ties or wooden stakes and twine to gently support plants as needed.
Herb Markers and Labels
Clearly label herbs with weatherproof plastic or metal markers. Engrave or write plant names with permanent marker. Use different shaped markers or colors to easily identify varieties.
With this basic toolkit, you will have everything you need to get your herb garden started and enjoy thriving plants throughout the seasons. Continue reading for tips on selecting which herbs to grow and caring for your plants!
Selecting the Right Herbs for Your Garden
With so many delicious and beautiful herb varieties to choose from, how do you decide what to plant? When planning your first herb garden, we recommend sticking to versatile culinary herbs that are easy to grow in your particular climate.
The herb varieties we suggest below have time-tested popularity in home herb gardens. They provide a range of distinct flavors to experiment with in the kitchen!

Popular and Versatile Herb Options
Focus on this core list of classic, easy-to-grow herbs:
Basil
A must-have for making pesto, adding to tomato dishes, and garnishing cocktails. Choose from sweet lettuce leaf, spicy Thai, or lemony African blue basils. Start new plants each year.
Rosemary
The piney, citrusy flavor of rosemary complements chicken, pork, potatoes, and more. An attractive shrub-like plant perfect for borders or containers. Overwinters in warm climates.
Thyme
An essential background flavor in many savory dishes. Lemon thyme also delicious. Thyme retains its flavor well when dried. Perennial in most zones.
Mint
Spearmint and peppermint add refreshing flavor to drinks, desserts, salads and more. Grow mint in containers to prevent aggressive spreading.
Oregano
The quintessential pizza herb, also delicious in tomato sauces, meat dishes, and Greek cuisine. Look for compact Greek oregano varieties.
Sage
Earthy, aromatic sage is the perfect pairing for rich meats and cheeses. Pineapple sage also lovely. Use sage sparingly as the flavor can overwhelm.
Parsley
A versatile herb perfect for garnishing dishes, pestos, and dressings. The flat leaf Italian variety has the best flavor for cooking. Parsley is easy to grow from seed or transplants.
Dill
Dill has an anise-like flavor and ferny foliage. Use dill to season fish dishes, pickled vegetables, dips and sauces. Replant this annual herb every spring.
Cilantro
The fresh, citrusy taste of cilantro is essential in salsas, chutneys, Thai dishes, and more. Grow cilantro in partial shade as the summer heat causes it to bolt.
Chives
Chives have grassy tops and purple flowers. Use them to add mild onion flavor to soups, salads, baked potatoes, and omelets. Chives are a perennial herb.
These ten herbs offer a breadth of culinary versatility. Once you gain confidence as a herb gardener, expand your plantings to include borage, lavender, fennel, and exotic varieties like lemon verbena, shiso, and lemon grass. The possibilities are endless!
Now that you have herb plant candidates in mind, it’s time to look at the optimal conditions for growth and care. Proper planting techniques and attentive care will set your herb garden up for success!
Herb Seeds
Herb seeds allow you to grow your plants from scratch and widen the variety of herbs. Start seeds indoors or in a greenhouse 6-8 weeks before the last frost. Look for seeds labeled as non-GMO, heirloom, or organic from reputable sellers. Popular herbs grown from seed include basil, cilantro, dill, and parsley.
Herb Seedlings
For beginner herb gardeners, purchasing young potted herb seedlings is easiest. Look for seedlings around 4-6 inches tall that appear vigorous with healthy green leaves. Transplant popular culinary seedlings like oregano, thyme, sage, and rosemary. Local garden nurseries have the best selection.
Planting and Caring for Your Herb Garden
Once you have your herb plants selected, proper planting and care will keep them thriving. Follow these tips to give your herbs the best chance of success:
Choosing a Sunny Location
Most culinary herbs require a minimum of 6 hours of direct sunlight per day. Limited sun exposure results in weak, leggy growth. If you have mostly shady beds, look for shade-tolerant varieties like mint, parsley and chives or grow herbs in moveable containers.
Ensuring Proper Drainage
Herbs are very susceptible to root rot if overwatered, so excellent drainage is key. Amend garden beds with compost and gravel to improve drainage. For containers, use potting mix blended for drainage and place rocks or pebbles in the drainage tray.
Compost
Compost adds important nutrients and organic matter to soil while improving drainage. Mix 1-3 inches of compost into beds before planting. For containers, blend 20-30% compost into potting mixes. Compost increases soil health and plant vigor over time.
Watering Regularly
New herb plants and containers require frequent watering to establish. Wait until the soil is almost dry 1 inch down before watering thoroughly. Established plants only need weekly watering unless extremely hot and dry. Take care not to overwater.
Herb Fertilizers and Plant Food
Use organic fertilizers like fish emulsion, compost tea, or all-purpose blends as needed to provide nutrients. Potted herbs may need more frequent feeding. Always follow label instructions and don’t over-fertilize. Too much nitrogen leads to excessive leafy growth.
Fertilizing Periodically
While herbs don’t require much feeding, you can apply a balanced organic fertilizer or compost tea a few times per season to encourage growth. Avoid high nitrogen fertilizers that promote leafy growth over flavor.
Harvesting Regularly
Snipping herbs frequently encourages bushy, compact plants versus leggy, woody growth. Harvest just what you need each time when herbs are most fragrant, in the morning after dew dries.
Herb Cookbooks and Recipes
Get inspired to use your homegrown herbs with cookbooks focused on herb recipes. Look for books that highlight preparations like sauces, seasoning blends, marinades, compound butters, infused oils and vinegars, and preserving techniques. Also feel free to browse my website for these topics I have already covered by articles.
Pruning for Shape and Health
In addition to harvesting for cooking, pruning herb plants for shape and to remove spent flowers improves their appearance and productivity. Prune leggy annuals like basil back frequently.
By selecting suitable herb varieties, planting them properly, and caring for them attentively, you can enjoy an abundant harvest. Before you know it, you’ll have more herbs than you know what to do with! Preserving methods allow you to enjoy their flavor all year long.
Harvesting and Preserving Your Herbs
Once your herb plants mature and fill out, you’ll want to harvest them at the perfect time to capture the best flavor. Here are some tips:
Harvesting in the Morning
For maximum flavor and aroma oils, harvest herbs in the early morning just after the dew has dried. The essential oils are most concentrated then.
Cutting Stems Just Above Leaves
Using clean, sharp pruners or kitchen shears, cut tender new growth stems just above the leaves where the stem is most flexible. Avoid removing more than one-third of the plant at once.
Air-Drying
Loosely bundle freshly harvested herbs and hang them to air dry in a warm, well-ventilated area out of direct sunlight. Alternatively, lay the herbs on mesh racks. When fully dried, store them in airtight containers.
Herb Drying Racks and Dehydrators
Use perforated parchment paper or mesh screens to dry herb leaves quickly while retaining color and flavor. Low temperature food dehydrators below 95 F are ideal for delicate herbs. Store dried herbs in opaque, airtight containers.

Freezing
Chopped herbs can also be frozen for longer term preservation. Spread them on a baking sheet and freeze initially, then transfer to freezer bags or containers. Frozen herbs are best used for cooking vs. garnishing.
By harvesting and preserving your herbs properly, you can enjoy their flavor, color, and health benefits year-round! An herb garden is the ultimate gift that keeps on giving.
Herb Gardening Basics
Growing a thriving herb garden, whether indoors or outdoors, is easy and rewarding with proper planning and care. Follow these herb gardening basics:
Top Tips for a Successful Herb Garden
- Choose a sunny location (at least 6 hours of sun daily)
- Prepare soil with compost to optimize drainage and nutrients
- Water when the top inch of soil becomes dry but don’t oversaturate
- Fertilize occasionally with organic blends to provide nutrients
- Harvest frequently by pinching stems just above leaf nodes
- Prune plants often to promote bushy, compact growth
Annual and Perennial Herbs
- Annual herbs like basil, cilantro, dill must be replanted each year. They quickly go to seed in the heat of summer.
- Perennial herbs like lavender, rosemary, thyme and oregano last over winter and regrow from their roots and stems every year.
How to Grow
- Start seeds indoors 6-8 weeks before your last frost date, or purchase transplants.
- Carefully transplant outdoors after the danger of frost has passed. Space plants according to mature size.
- Pinch off flower buds to prolong leaf and stem growth. Allow select herbs to flower for pollinators.
Propagation by Stem Cuttings
- Take 3-6 inch stem cuttings from established plants, cut just below a leaf node.
- Remove bottom leaves and place cutting in water or potting mix to form roots. Plant the rooted cuttings.
Patio or Container Herb Gardening
- Select containers at least 12 inches wide and 10 inches deep for most full-sized herbs.
- Use potting mix formulated for drainage by mixing soil
Patio or Container Herb Gardening
- Select containers at least 12 inches wide and 10 inches deep for most full-sized herbs.
- Use potting mix formulated for drainage by mixing soil, compost, and perlite/vermiculite.
- Position containers in full sun and keep soil consistently moist but not soaked.
- Fertilize container herbs regularly as nutrients leach out with watering.
- Bring containers indoors before first fall frost.
Growing Herbs Indoors
- Choose compact herb varieties suitable for indoor cultivation.
- Grow herbs in containers near sunny windows or under grow lights. Use timer systems to optimize light exposure.
- Monitor indoor humidity and air circulation to prevent mold and disease.
- Pinch and prune herbs frequently to encourage bushy growth in limited space.

Preserving and Drying Herbs

- Harvest herbs in early morning then use or preserve immediately.
- Dry herbs by hanging bundles or laying on screens in warm, well-ventilated areas.
- Store dried herbs in opaque, airtight containers and use within 1 year for optimal flavor.
- Chop herbs finely and freeze in ice cube trays covered with water or olive oil.
Herbs to Attract Pollinators
- Allow some herbs like basil, borage, thyme, sage, dill, and fennel to flower.
- Herb blossoms provide nectar for bees, butterflies, hummingbirds, and other pollinating insects.
- Plant herbs in clusters for easier access by pollinators.
Collecting Herb Seeds
- Allow select annual and biennial herbs to fully flower and develop seed heads.
- When seed heads mature and dry completely, snip them off into paper bags.
- Crush or rub seed heads between fingers to separate seeds from chaff.
- Store seeds in sealed envelopes or glass jars in cool, dark place. Label with plant name and date.
Pest Management for Herbs
- Many common garden pests like aphids, spider mites, and caterpillars can damage herb plants. Inspect regularly.
- Squash soft-bodied insects like aphids by hand or spray with insecticidal soap.
- Remove caterpillars by handpicking. Apply Bacillus thuringiensis to naturally control them.
- Control slugs and snails by handpicking at night or using iron phosphate bait pellets.
Conclusion
I hope this detailed guide has provided you with all the helpful knowledge you need to get started cultivating your own herb garden! Having homegrown herbs within arm’s reach has made cooking and garnishing dishes such a breeze for me. You’ll also get to benefit from the immense satisfaction I’ve experienced of nurturing herbs from seed to harvest.
With the proper essential supplies, plant selection suited to your specific climate, and consistent care practices I’ve outlined, you’ll be harvesting heaps of flavorful herbs in no time at all – I’m excited for you! Remember to pin or cut stems just above leaf nodes and use or preserve them as soon as possible after harvesting for the best flavor.
Growing herbs has been such a fun, rewarding hobby for me as a gardener. Incorporating my homegrown herbs into cooking and DIY body care products has opened up endless possibilities for creativity and savings. I wish you the best of luck with planning and planting your herb garden, and look forward to hearing all about your bountiful herb harvests!
FAQ
Which herbs are the easiest to grow?
Some of the easiest herbs to grow include parsley, mint, basil, oregano, thyme, sage, rosemary, and chives. Most are low maintenance and suited to container or garden growing.
Where is the best spot to plant an herb garden?
Herbs thrive in a sunny spot with at least 6 hours of sunlight. Having them in a kitchen garden close to your cooking area makes harvesting convenient.
How much sun do indoor herbs need?
When growing herbs indoors, situate them in a south-facing windowsill or under grow lights on a 12-16 hour daily timer.
What type of soil do herbs prefer?
Most herbs grow best in well-drained soil amended with compost. Container herbs should be planted in potting mix blended for drainage.
How often do I need to water herb plants?
Allow soil to dry out between waterings, then soak thoroughly. New plants need frequent watering to establish. Mature herbs only need weekly watering unless extremely hot.
Should I fertilize my herbs?
While herbs are not heavy feeders, applying organic fertilizer or compost tea every few weeks nourishes container and garden herbs.
When should I harvest herbs?
For best flavor, harvest herbs like basil, cilantro, and parsley in the morning after dew has dried. Snip tender new growth.
How do I dry herbs from my garden?
Rinse herbs, then hang bundles or spread on racks in a warm, well-ventilated area until completely dried. Store in airtight containers.
Which herbs are easiest to grow indoors?
Choices like parsley, basil, oregano, thyme and chives thrive indoors in pots. Ensure they receive sufficient sunlight from a window or grow lights.
Can I grow herbs all year?
Tender herbs can be brought indoors before first fall frost to extend the growing season. You can also grow herbs year-round as houseplants or under lights.